I’m really enjoying Lego’s collectible minifig series, but they’re beginning to over flow the top of my book shelf, time to give them a more suitable home.
This is the second print block drawer that i have for displaying Lego figures. I put the first one up several years ago, it houses some of the classic space and castle figures form my childhood, along with some of the newer licensed characters. This one however was bought with the sole purpose of displaying the collectible minifig line.
There are plenty of these on ebay, they make great display frames for anything you can fit in them. The one above has nice regular openings, but others are more varied. This one will keep all the minfigs up to series 6 neatly arranged and adds a bit of character to my dining room wall.
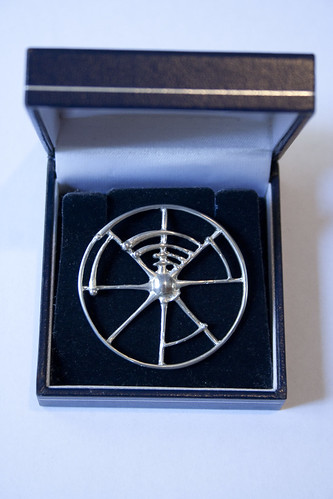
I made this brooch as an 80th birthday present for my Gran. I came up with the idea of making a brooch involving some kind of planet design. It took quite a few revisions, but eventually I came up with something that I was happy with.
The construction involved CNC milling, silicone mould making and pewter casting to create the finished brooch.
The box features a switch and a hinged lid. When someone presses the switch an arm inside lifts the lid, switches the switch back in the opposite direction and then closes again. Useless, but strangely compelling.
After seeing the original most useless machine ever I couldn’t resist making one myself, not for myself though, this one was a present. As the site hosting the original is horrible, I used the nice clear instructions provided by Make Projects.
I spent some time looking for a suitable box to house the machine’s useless innards, but finding one the right sort of size without any ugly decoration proved tricky, so I opted to make the box myself.
I have a Sony Vaio laptop (model VGN-C1Z), which all of a sudden developed a serious illness. The screen was covered in lines during bootup, both the BIOS and Windows loading screens, then it would just blackout when Windows finally loaded. The lines over the BIOS screen told me it was a graphics card problem and being a laptop I feared the worst. It turns out that I’m not the only one with this problem. The culprit here is the nVidia 7400 GPU. It seems that as the chip gets hot and cools down repeatedly, the solder bonds under the chip are weakened and eventually become faulty.
Now, it stands to reason that if the only error is poor solder connections, that I should be able to heat the chip up again and reflow the solder to create nice strong bonds again. Well to test my theory I booted the laptop, pressed F8 to get the windows boot menu and started in VGA mode. This let the laptop start Windows, albeit with everything looking huge due to the 800×600 resolution. Then I played helpful 720p videos until the laptop got very hot. A reboot later and the lines on the screen had disappeared! The laptop had magically resoldered itself. Sadly this didn’t last and the problem quickly returned.
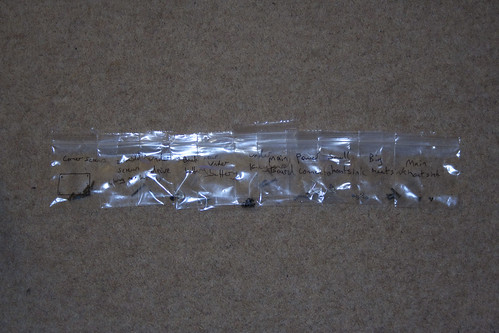
An easy way to keep track of the screws
I needed a more permanent fix, so I bought myself a heat gun and set about taking the laptop apart. Now a tip here is to get yourself a load of small plastic resealable bags. As I removed the screws I labelled a bag and put the screws in, so I might have a bag labelled ‘corner screws base’ with all the main screws from the base…obviously. Also, if you lay the bags out left to right in the order you took them out in, then you can easily follow the order in reverse to put everything back together.
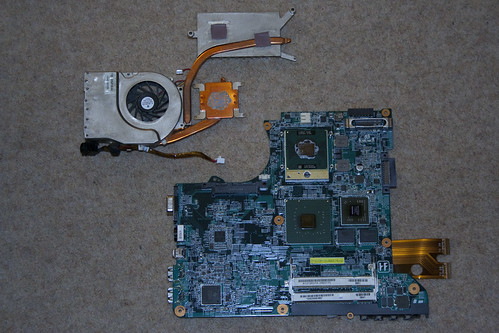
Heatsink and motherboard
After removing all the base screws, taking out the HDD/DVD drive (there are 3 screws under the drive), you have to flip it over and take off the keyboard, which is secured by small clips along the top edge and has a flat plastic ribbon on the back which has to be unplugged. There are 3 screws under the keyboard, which when removed will allow the laptop to come apart nicely. You can then unclip the wires from the motherboard, unscrew it and take it out. Then you remove the heatsink and finally the faulty nVidia GPU becomes visible.
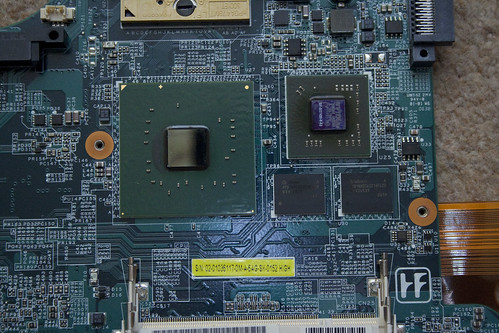
nVidia chip is the medium sized one on the right
I took a piece of tinfoil and rubbed it over the GPU to give me the outline. Then I cut out a section of foil inside the outline and covered the motherboard so that only the GPU was showing. I set my heat gun to 400C and holding approximately 15cm away to start with heated the nVidia chip. I did this for about a minute then let it cool down, before repeating the process again a couple of times, just to be sure. I then connected the bare minimum back up to the laptop to test it and SHAZAM! no lines on the screen. Job done. It was then a simple matter to take the screws out of their little labelled bags in reverse order and put the laptop back together. I’m still using the laptop with no problems since.
Update – 5th June 2011: Added some pictures I’d taken of the process to make things clearer.
2011 – the year of the sausage! or so it seems. Having received a sausage stuffing machine for Christmas, I spent most of my January weekends making sausages. The Sausage Sausage dog is the sequel to our Dalek Bread in our food with silly names series.
Sausage making is great fun, like all good hobbies it’s easy to pick up but difficult to master. Homemade sausages are easily more tasty than the cheap supermarket ones, and hopefully one day I’ll be able to make ones as nice as our local butcher.
The sausage sausage dog came from my third attempt, my first at a fancy sausage, namely pork and apple. These were much better than the first two tries earlier in the monnth, I had a better idea of the required consistency and soaking the meat for 24 hour in apple juice surely helped as well.
My guide through what i can legitimately call a sausage fest has been The Sausge Book by Paul Peacock an excellant book that explains an awful lot (even how to twist and bunch them up). The skins I’ve been using are from this eBay store.
More Sausage making pictures can be seen in this flickr set. Sadly, things didn’t end well for the sausage sausage dog, he died due to a fatal frying pan related incident the following morning, just before breakfast
My wife likes chocolate yet she never wants an advent calendar, so I decided to make her the ultimate chocolate advent calendar.
Materials
22 x standard bars of Cadbury’s dairy milk
1 x medium sized bar (her birthday is on the 4th of December)
1 x 1kg bar of dairy milk
Tinsel
4′x2′ sheet of mdf
Hot glue
Sticky foam pads
Sticky bows
Silver spray paint
Sticky Shiny Numbers 1-24
The MDF sheet was spray painted silver and tinsel hot glued around the edge for decoration. Each small had 2 sticky pads stuck to the back and a square of purple card with the appropiate number stuck to the front. The kilogram bar had several sheets of sticky pads and 2 sticks of hot glue to hold it on.
Construction time was about 3 hours (an awful lot of sticky pad peeling was involved) with an hour or so of that waiting for the paint to dry.
My Wife loved it (it was after all mostly chocolate) and has a few jealous friends who have to make do with the a standard advent calendar.
I’m quite interested in robots with organic movement, the sort of thing that looks creepy due to its unnatural naturalness and with this in mind I’ve started looking into building a robotic/animatronic tentacle arm (Japanese schoolgirls beware!). My first step was to have a look at the sort of thing floating about on youtube already, I’ve compiled some of the best examples into a playlist.
The basic structure seems to be a set of ribs with guide holes for wires, spaced along the length of a flexible tube. Control wires run up through the ribs and are tied off at the end of the arm so that when they are pulled at the base the arm flexes outward toward the side that the cable is on. To get a feel for the workings I decided to knock up my own simple version using cardboard ribs and 3 control wires. I made the template rib shown below and copied it multiple times to fill a sheet of A4 paper (print @ 300dpi for correct scaling).
Rib segment template
I printed out my page of ribs and glued it down to some scrap cardboard, then I cut out 8 or so (I would have done more but got bored). Once I had a stack of arm segments I looked around for something suitable to use as the flexible core, the first thing that came to hand was the inner tube of an old biro laying on my desk. I made holes in all the rib segments using a pin and scissors, then started to thread them onto my biro core. To keep the segments separated I cut short (15mm approx.) lengths of clear plastic air tubing, the sort used in fish tanks. These fitted snugly over the core and were stiff enough to add strength to the arm.
Once I’d stacked up as many segments as would fit (7), I cut 3 lengths of fishing line and ran them up through the ribs to the top end of the pen, where I tied a simple slipknot in the end of each piece and tightened them over the biro. To hold the whole lot vertical I simply clamped the biro tube in a small vice.
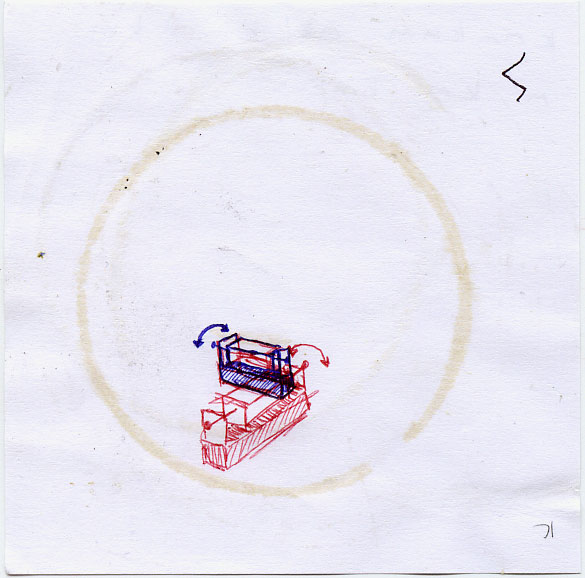
I was thinking about making some kind of joystick contraption to control the arm to begin with but after a quick sketch and a cup of tea realised that I was over-thinking things considering the rough state of the arm, and I decided instead to use a marionette style controller made from two pencils taped into a cross shape. I did cut a flat into the middle of each pencil to stop them twisting away from square, but even that might have been overkill. I notched the ends too so that the fishing line could be secured easily, again using slip knots, and that was pretty much it.
The expertly crafted tentacle arm and controller
It works quite well given the simplicity of the setup and has definitely made me want to go on to a slightly more complex version, probably using my CNC machine to cut the next set of ribs from MDF or plywood.
After seeing this article on Hackaday describing an easy to make silicone casting material I knew I had to give it a quick go. The photos here show the results of making a mold of a polymer clay heart and then making a heart shaped ice cube from it.
Oogoo is basically equal parts corn flour and sealant, mixed into a white goo. This Instructable has all the details for making Oogoo and fully documents its many uses.
Mixing Oogoo takes a bit of effort, I used a cardboard tub as a container and an old paintbrush handle to mix with, this probably made it more difficult than it needed to be but that’s what I had to hand.
Once mixed, i found it quite difficult to spread over my heart form, next time i plan to wear latex gloves and shape it by hand.
Even with my shoddy mixing, crappy tools and less than ideal spreading technique, I ended up with a usable mold in around 2- 3 hours. To test it out, I simply filled it with water and froze it for an hour or two.
As you can see, the Ice heart isn’t perfect, but it’s pretty close. A definite success!
In future, if I need to make a mold for any reason, Oogoo is going to be my first port of call, its quick, cheap and absolutely stinks of vinegar. What more could you want?
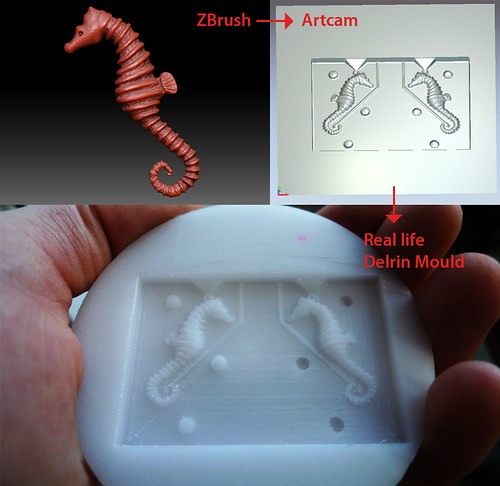
I was looking for a project that involved mould making, and asked my girlfriend if she wanted me to make her anything…she decided on some Seahorse earrings, so I set to work.
The Grim Reaper’s garden was originally very different. My intention was a nice scene featuring typical model railway figures. When I got to the model shop, this fella caught my eye, how could i not buy Death? Once you have Death, the graveyard follows pretty quickly.


