Renovating a kiln controller – Part 1
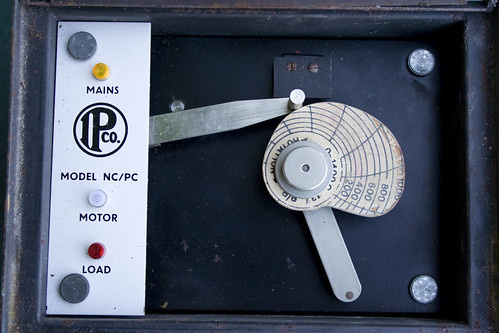
Very luckily I came into possession of a free electric kiln. It came with an old temperature control unit that I’ve decided to get back into working order so I can fire my own ceramics. The controller is made by the Industrial Pyrometer Company, which now seems to have become Mitsco. It uses a clever cam-follower system to regulate the kiln temperature and heating rate. The cam wheel has a scale laid out on it with the rings corresponding to 100C increases and the radial bands equaling 2 hour periods (a full rotation takes 24 hours). A sprung arm follows the edge of this cam around and through a system of gears, rotates a potentiometer inside the unit. An R-type thermocouple probe is used to monitor the temperature inside the kiln providing feedback to the control unit, which is compared to the cam-follower position using a simple Op Amp circuit (based on an F709PC chip). A relay is then triggered to turn the kiln on or off.
When I opened the controller up I found it in surprisingly good condition. It was very clean and the only obvious problem was an Electrolytic Capacitor that was oozing goo.
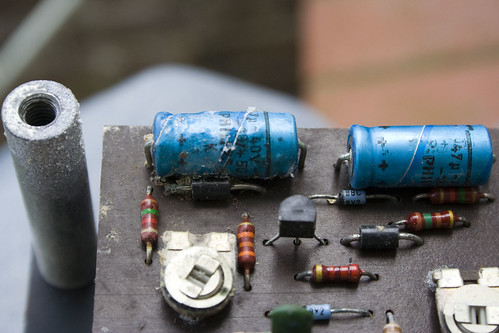
Dodgy capacitor oozing goo
It was a fairly quick job top replace the cap with a nice new one. All the other components looked fine so I left those alone.
The next task was to figure out how to connect the thing up. Using a multimeter to trace the existing wires back to their connections made this fairly straightforward on the external side. Internally took a bit longer as I had to track all the wires back to their various components. I’ve drawn up a nice colourful schematic of what I found.

External wiring block

Pyrometer schematic, rendered in coloured pencils
I hooked up the mains power after installing working out what should be comnnected where and held my breath…luckily nothing exploded and everything seemed to be ticking over fine. I hooked up a light bulb as a test load and used a cigarette lighter to heat the thermocouple probe. It seems to function as expected, switching the light on and off in relation to the temperature and position of the follower arm.
The relay inside the controller looks a bit too wimpy too switch a kiln on and off, so I’m going to make an external relay box with a nice beefy relay in to handle the actual switching and hook the wimpy relay up to the coil of that one.
There are a couple of variable resistors on the PCB inside the controller that seem to be used to calibrate the thermocouple voltage against the cam-follower arm position. My next task is to hook up the the thermocouple using the new compensating cable that I bought and then put the probe in an oven at a known temperature (about 100C should do it). Then I can fiddle with the resistors on the control board until the relay switches on and off at the right temperature. That’s coming up in part 2.
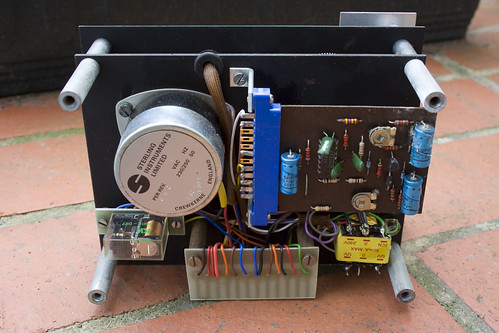
Inside the controller
June 2nd, 2010 at 9:10 pm
[...] June 2, 2010 by barleyhollow Renovating a kiln controller – Part 1 | accomplished. [...]