Lego Mosaic
Parts List
- A Photo, drawing or idea
- Lego lots of
- more Lego
- Time
Step One – convince the NLSO (Non Lego significant other)
I’d wanted to make a Lego mosaic for some time, but lacked suitable Inspiration. Nine months later and inspiration hit in the form of my new born daughter, Ffion Carys.
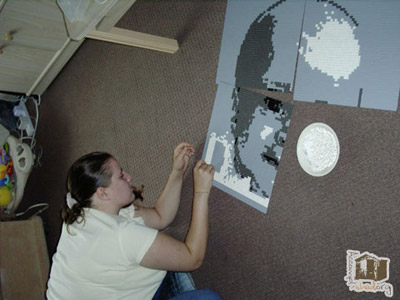
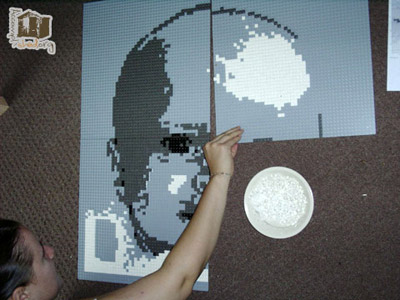
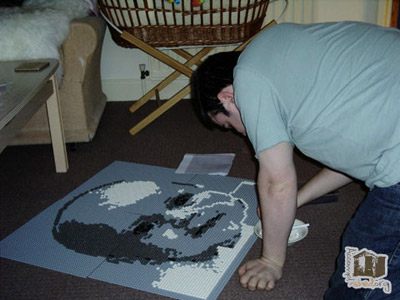
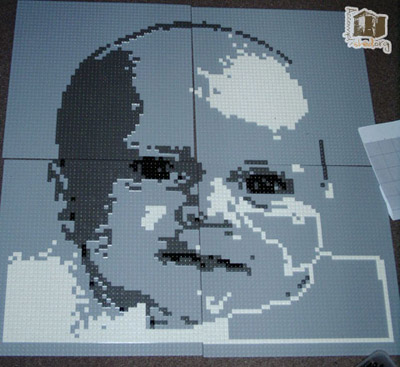
When Ffion was about 4 months old, I started the mosaic. It took a while to convince Lou (my fiancée) that this was a good idea and worth the money. She was up for a mosaic, but only a small one, I wanted a big one (don’t we all?). Anyway the 2 images to the right convinced her, one is a single Lego baseboard (48*48) the other is 4 baseboards (96*96).
I found a suitable picture of Ffion that my brother had taken when she was about 3 months old, a bit of tweaking was needed, just to straighten it up a bit.
I reduced the image to 90 *90 pixels (giving me a 3 pixel border) and reduced the colours to a close approximation of the Lego bricks I was planning on using ( Black, Drk Grey, Light Grey and white).
So far so good, once I had the image at the right size and colour, I used a program called Bricksaic to generate the plans. Bricksaic does a lot more than just generate the plans. It can do all the parts I did in photoshop, but I preferred to have the extra control over the image.
The Plans also gave me a piece count. About 8000. ouch!
This is the point at which I made a mistake, I generated the plans without the border on, so all my plans were shifted 6 studs up and left. I wouldn’t find this out till some time later when I had the parts and the plans printed.
Step Two
I needed baseboards, 1×1 studs and border pieces, that all came to 8500+ pieces, now if each piece was a penny it’d be a lot of cash, most bits were more than a penny (all of them in fact). The hardest part of selling this to Lou was cost, I predicted it’d be about £150. After agreeing to pay for it from my personal dev fund I was on the hunt for the parts. Baseboards came from a local toyshop and lego.com, a reasonable price compared to toys r us. I’m down about £30 already, ouch.
Next up is the the smaller quantities of 1×1 studs, black, white and dark grey, about 1/3 of the total piece count. As the base plates are light grey, I could get away with not buying the 5000 light grey bits for a while.
Sourcing enough white parts in the UK was difficult, it required 3 orders from 3 people. All the bricks were bought from bricklink, a sort of Lego eBay.
The first stage of construction was quite easy, taking an evening and a day to do.
Early photos looked great, some people (Lou) would have left it like this, but the seams between the baseboards annoyed me. Back to brick link and £90 of light grey plates, some 2×2 plates for bracing and 2×2 black bricks for the border. Mistake number 2, changing my mind to have a smaller border. My rough estimation said I’d have enough 1×1′s to finish, more on that later. Receiving the 5000 light grey bricks in the post made me feel like some sort of plastic drug smuggler. This lot cost about £90.


Step Three
Clicking 5000 bricks into place is boring, bloody boring, no two ways about it. This stage took ages, early on in the project i decided to have all the studs orientated the same way, so the word ‘Lego’ was the right way up on each of them, not doing that again!
This stage took a while, it’d lost a bit of motivation, we’d had the christening and all sorts of little things kept me from carrying on. I eventually sat down and attacked the remaining bits in a bout a week and a half of evenings.
It’d left the middle 2 columns and rows till the end so I could place the 2×2 plates to help join the mosaic together. This is where I learnt my calculations were wrong. I didn’t have enough light grey, worse still it wasn’t a lot, being 100 short would have been ok, but I was 20 short, 20 when I’d ordered 5000!!
I decided to carry on and order the extra bits later. I was determined to mount the mosaic while Lou was in Wales. I’d bought a sheet of 6mm mdf, it was 4ftx2ft, I cut it to 2.5ft x 2ft and planned to let the bottom 6 inches hang free. I was using carpet tape and hot glue to attach the base plates to the mdf. I left it flat for a few days to allow everything to set, I was quite nervous at this point, but every thing had gone well and it was all very secure. Two eyelets were screwed in each side and picture wire was used to hang the mosaic on 2 screws me and my brother had put in the wall. The mosaic was finished (apart from those 20 bloody pieces!!).
Update: the mosaic is still up, and the glue still holding. Woo!

